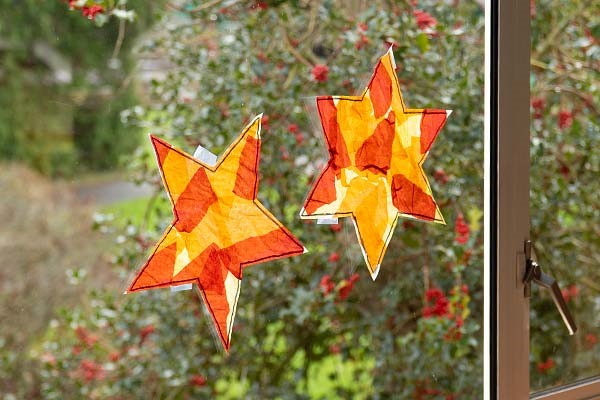
Christmas Star For Window: EASY CHRISTMAS CHORE: TRANSLUCENT WINDOW STAR
This year, more than ever, making children feel the warmth of Christmas is very important. In this article, I will guide how to design Christmas Star For Window step by step.
We offer you a simple job that offers children the opportunity to explore the world of colors and create a nice decoration for the holiday season.
Christmas Star For Window
Needed : colored tissue paper , glue, glue brushes (optional), baking paper, permanent markers.
- Cut the tissue paper into small pieces. Choose warm, light colors such as yellow, orange, pink or light green, which allow the light to shine more intensely.

- With a permanent marker, draw the outline of a large star on the parchment paper (adult support may be required for this step).

- Cover part of the star with glue using a special brush or, alternatively, your fingers. Dilute one part of glue with 1 part of water in a jar. This will make the glue easier to spread (we recommend that you have a damp cloth handy for sticky fingers).

- Press the pieces of tissue paper onto the glue-sprinkled part of the star, making sure that no exposed areas remain.

- Repeat steps 3 and 4 until you have covered the entire outline of the star.

- Smear more glue on the ends to make sure the tissue paper is firmly attached.
- Let it dry for a few hours (even better overnight).
- If necessary, place the star under a stack of books to ensure it is secure.
- Remove the excess tissue paper from the edges of the star.
- Hang the finished star on a sunny window and watch the light shine through it.

I hope you understand better how to create Christmas Star For Window with these guides if you have any questions about this topic EASY CHRISTMAS CHORe


