How To Take Screenshot On Laptop PC – Definitive Guide
For some, it may be obvious how to take a screenshot on a laptop or a desktop PC , but our intention is not only to limit ourselves to the ImpPant key on our keyboard, but to go much further.
Index of contents
Here you will find all or almost all the possibilities that Windows gives us to take screenshots, windows, videos and also games. In the latter case, the issue can get quite complicated and there are wonderful tricks to get out of the way. And even if you are an expert, you may still learn some other trick that you do not know. Let us begin!
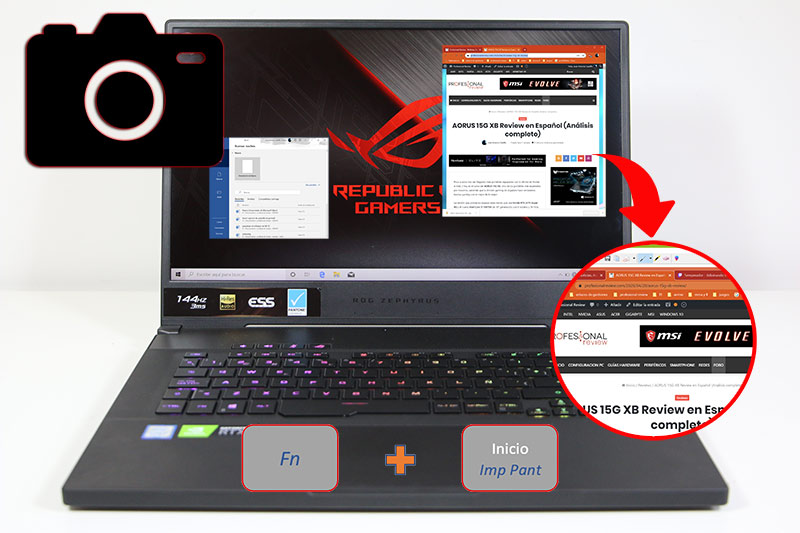
Take screenshot with Windows 10 and the keyboard
We are going to start at the beginning and with the most basic thing that every user with a laptop should learn, and that is using our keyboard.
From the first versions of Windows with a graphical interface, the system has an integrated function to take screenshots on a laptop or desktop PC, on any monitor or monitors that we have installed, since the function will affect the screens that we have in the same way. installed on the PC.
Keyboard shortcuts on laptop
On a laptop keyboard, the method to follow to take a screenshot is different than that of a normal keyboard. This is because normally this row of keys has a double function , for example, Screen Print / End simultaneously, or Screen Print / Start , or functions of the style. Each manufacturer does this differently .
Under normal conditions with a standard keyboard, we should only press the key in which the information of Imp Screen, Prt Sc or Imp Pnt is registered. In all cases the meaning will be to print screen.

But the fact of having a double function key means that to access one or the other we will need to use a second key , being the “ Fn ” of Function . So we must do the Fn + Imp Pant combination to be able to capture the screen. Of course we must make two differentiations:
- If Print Screen appears as the first option on the key , then it will be the main function and we will not need to press Fn
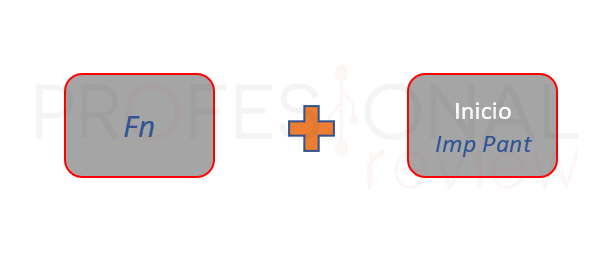
- If Imp Screen appears below another function , then it will be activated if we press Fn first
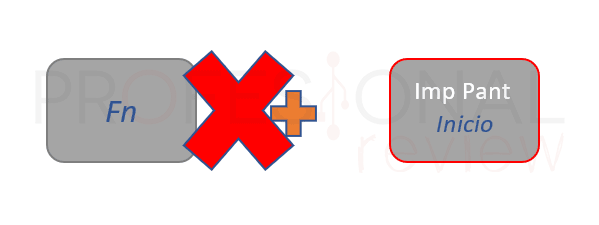
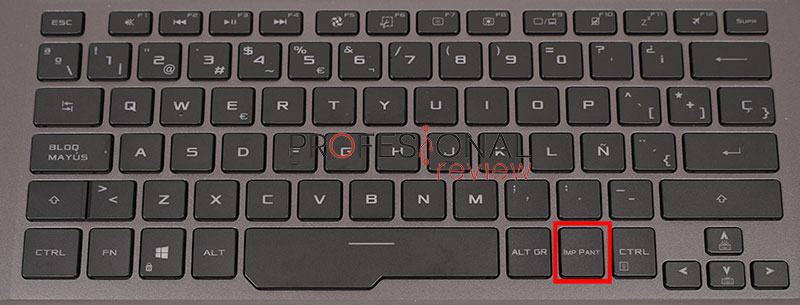
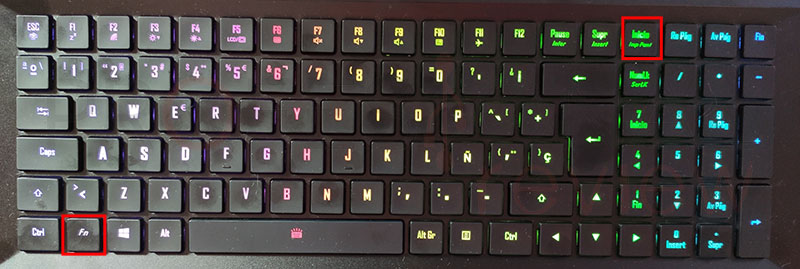
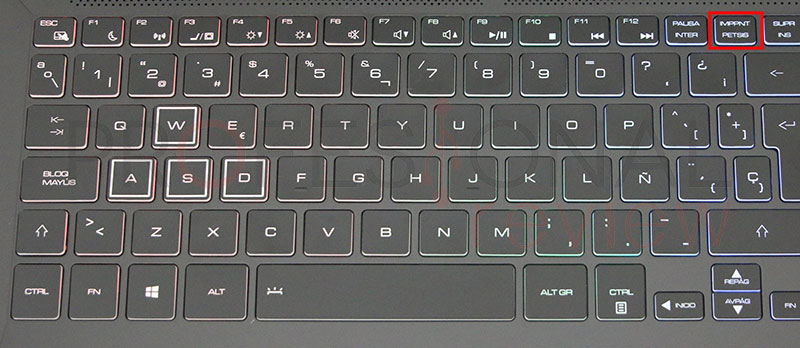
There may be different keyboard layouts depending on each manufacturer. Therefore we are going to put some representative images of the above.
In the first case, the first point that we have explained is shown, that is, we would not need the Fn key to activate the function because it is on an independent key. In the second and third case, the opposite occurs, the function is presented as secondary and in italics, which means that we must activate Fn (also in italics) to activate the function. Finally, in the fourth case, Imp Pant is the first option, so we would not need to use Fn either.
This dynamic is not only used to take a screenshot on a laptop PC, but also to use all the functions of the rest of the F keys on our keyboard.
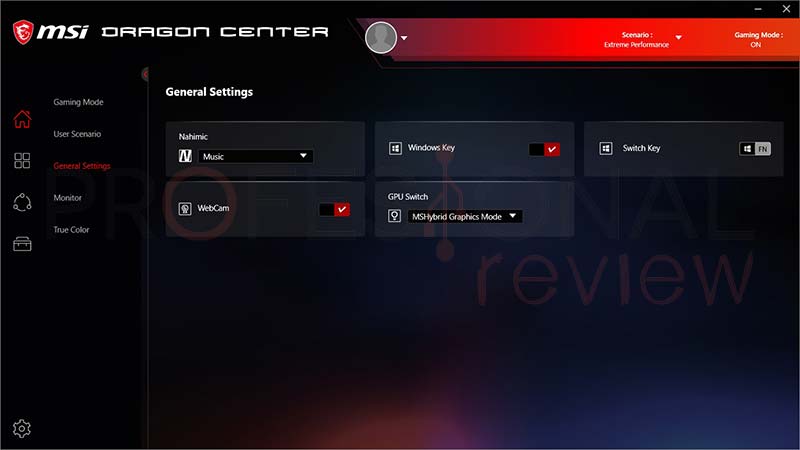
If it doesn’t work, we should consider the possibility that the laptop software has the features disabled. Programs such as Armory Crate from Asus, Armory Crate from MSI or Control Center from Gigabyte / AORUS allow you to activate or deactivate functions from them
Capture a single window
But of course, capturing the full screen of our equipment is just the tip of the iceberg of what we can really do.
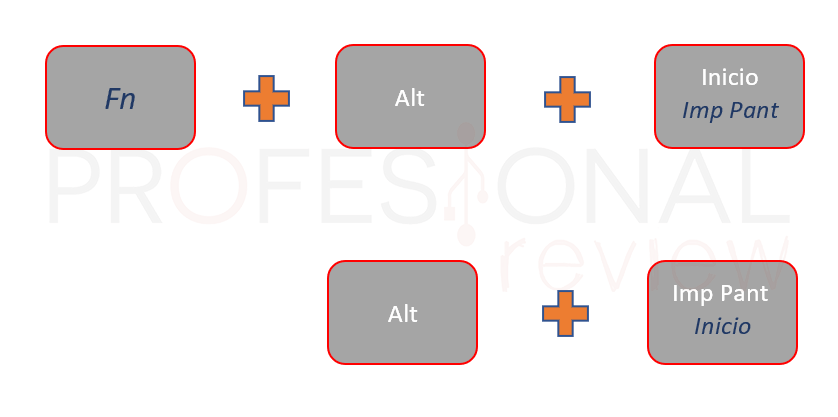
On many occasions we do not want to make a general capture, which is what Imp Pant does, but only a snapshot of a window or a single program on our desktop. This is also possible to do directly with our keyboard.
To the previous keyboard shortcut we must now add the “Alt” key (the right one). In this way we can only capture the active window . Of course, if there is no active one, the entire desktop will be captured. It would be like this:
Capture and copy the image to a program
We go one step further in our quest to capture screenshots on laptop PC and it’s time to save the photo somewhere, right?
When we take a capture, the system stores this photo on its clipboard . It is like a small region of memory where it remains waiting to be used or is overwritten as soon as we copy another file or make a new capture. Of course, at present it is possible to save more than one object on the clipboard, being an extra function implemented in Windows as of version 1909.
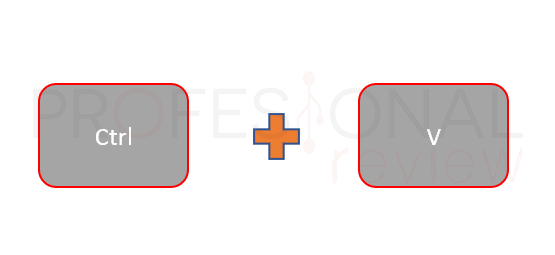
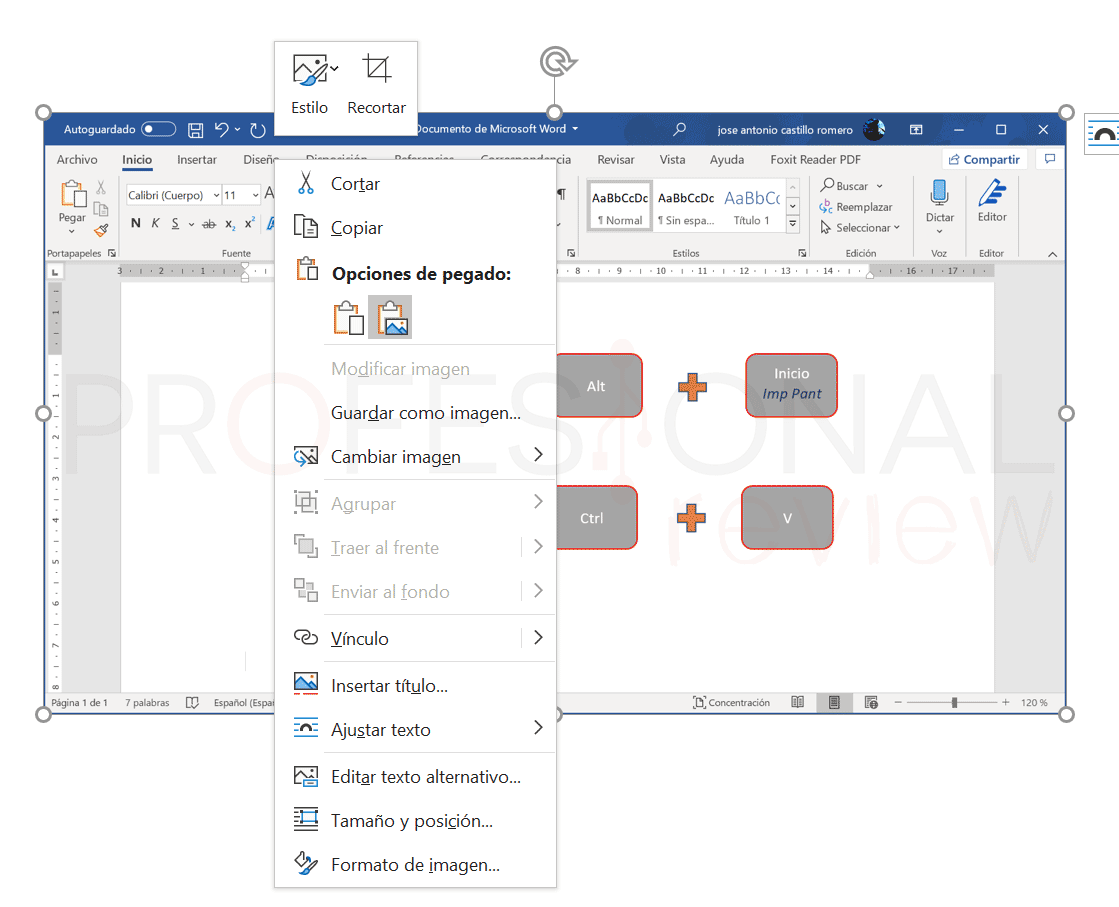
The easiest way to use the image is by pasting it into a program , be it Photoshop, Word, Paint, Excel, etc. For this we will use the combination Ctrl + V or by clicking with the right mouse button and choosing to paste .
Save screenshot directly
Sometimes the most desirable thing is to be able to directly store the screenshot we make of the screen, and we also have a keyboard shortcut available for this function:
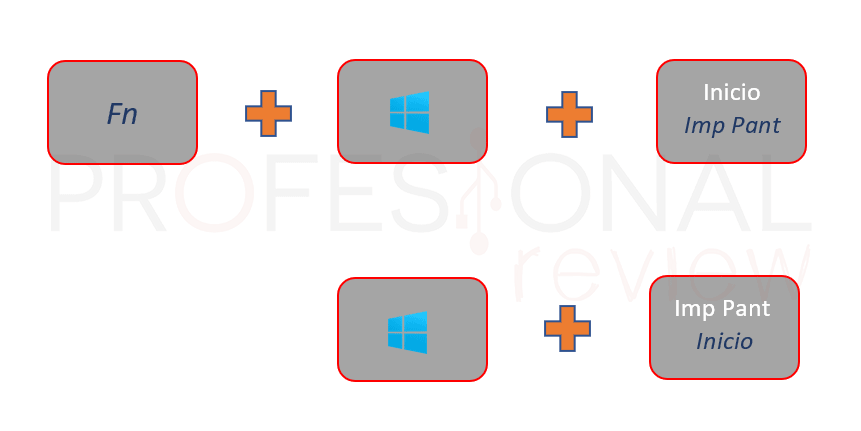
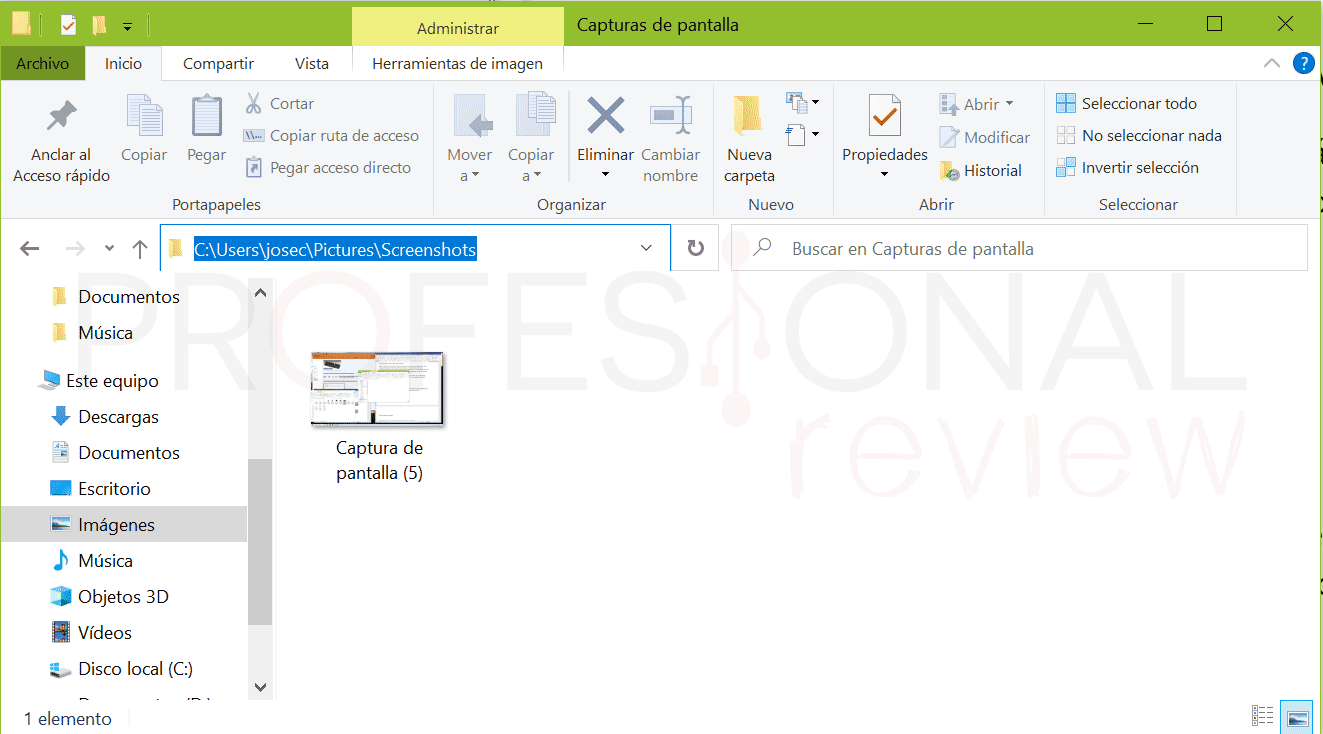
The capture will be stored in the folder of images within our user folder.
Use on-screen keyboard
We cannot consider it a method as such, but it is possible to take screenshot on laptop PC with on-screen keyboard . Although it is a possibility, there are more effective methods within Windows that we will now see.
To open the on-screen keyboard we only have to go to the start menu -> Windows Accessibility -> On-screen keyboard.
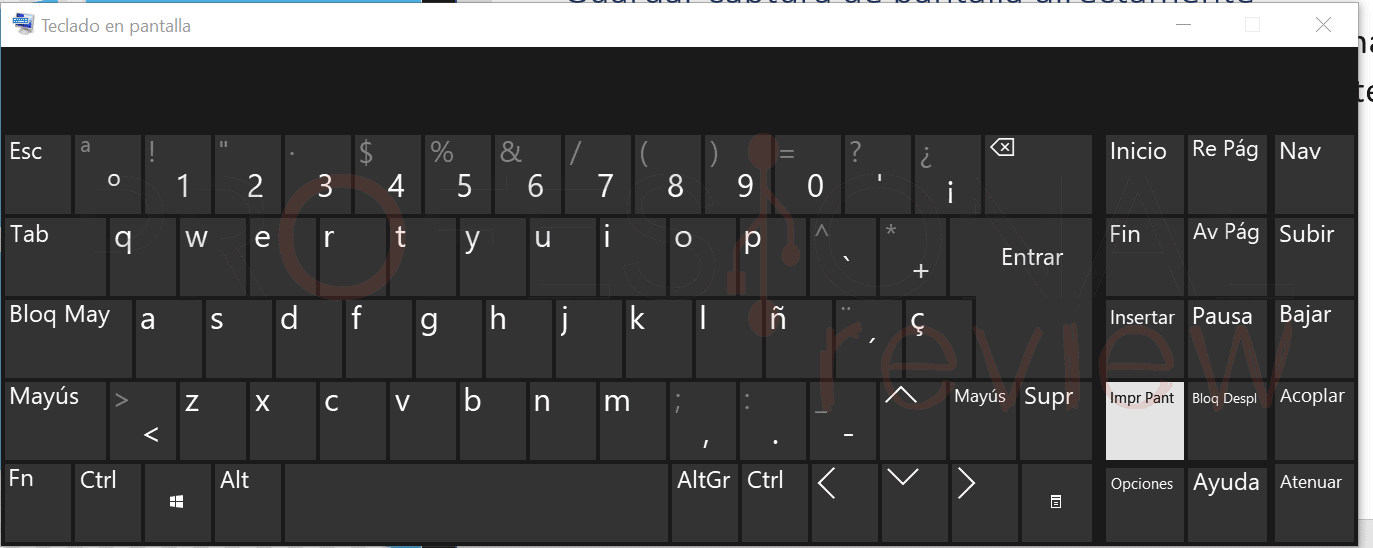
These would be the basic options available to Windows along with our keyboard to make captures. Now we will see the most interesting ones .
Other ways of taking screenshots (games and other programs)
In this new section we will explain the ways to capture a screen on a laptop using other applications that are also installed in the operating system.
If what we are looking for is for example to copy a single region of the screen , or even make a cut with a certain custom shape, then now we will see how to do them.
Use snipping tool (traditional and new)
Windows has not only one application but two of them , which are called Snipping Tool and Snipping and Annotation . To keep things simple, this is the basic version available from Windows 10 and earlier versions, and an enhanced version available from 1809 onwards.
Snip Tool
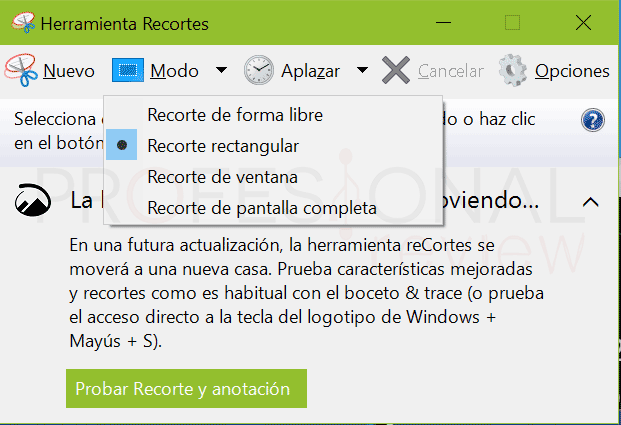
To access it, click on Start and write this same title . The application will look like the following:
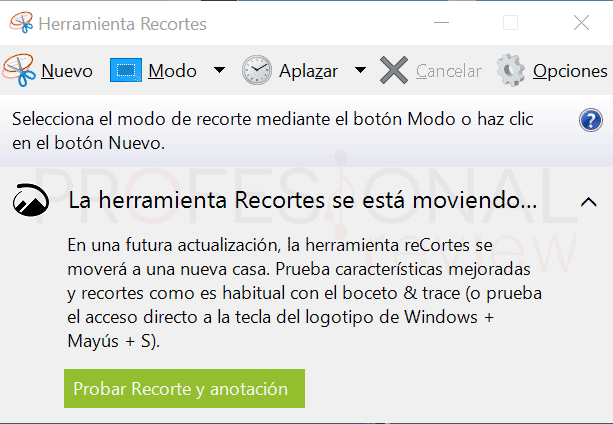
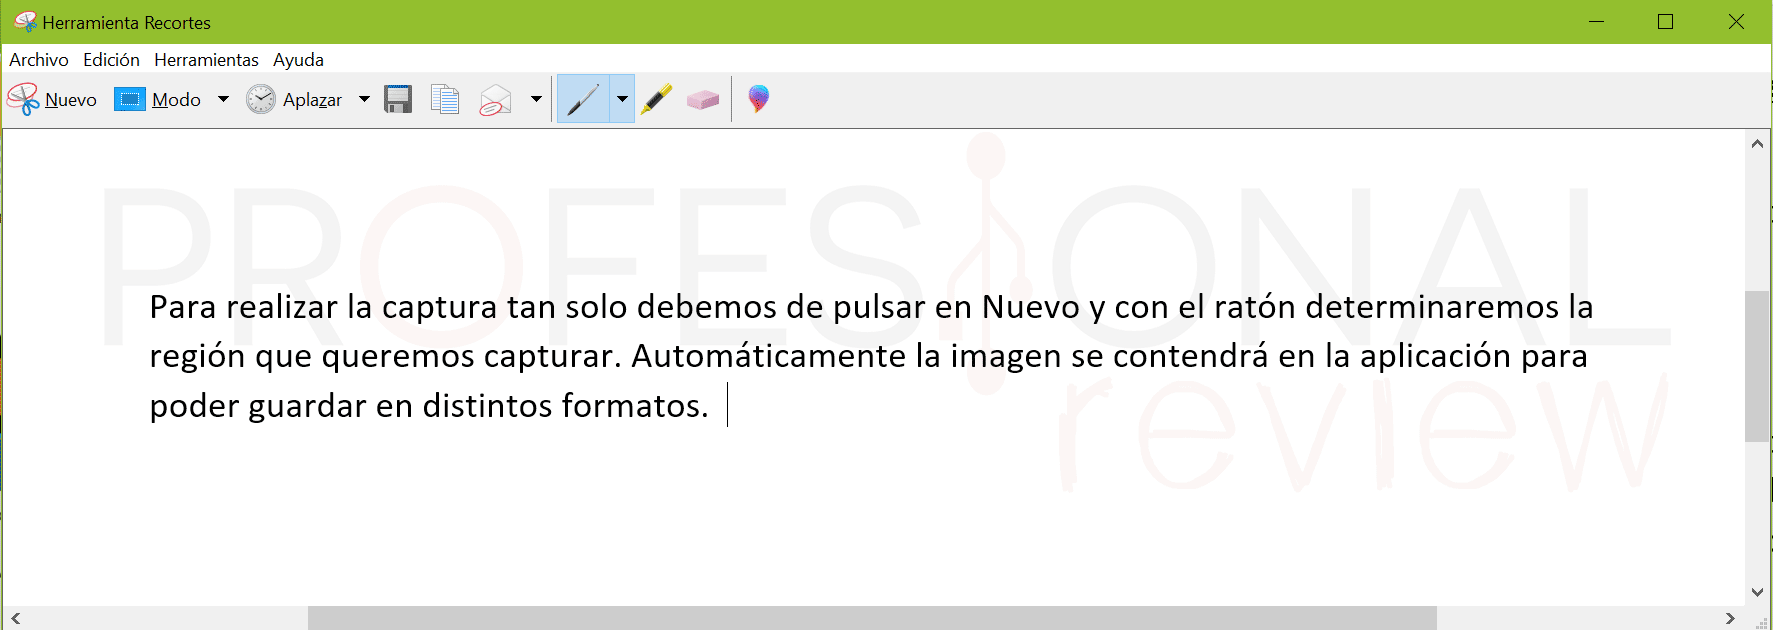
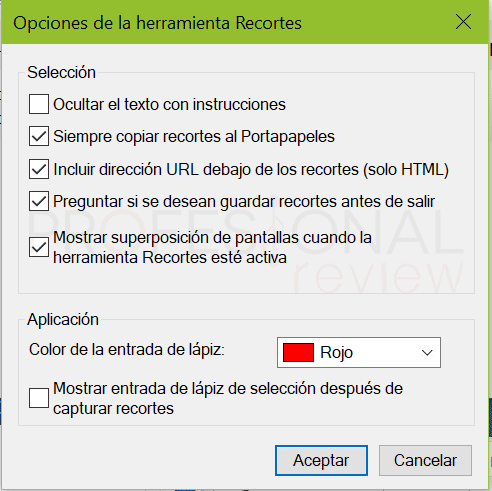
At first it will inform us of the existence of a new version, which we will now see. With it we can do many actions, such as capturing full screen, windows, a region defined by us and even freehand . In addition, from the configuration options we can activate extras such as adding a URL under the capture among other things.
To make the capture we just have to click on New and with the mouse we will determine the region that we want to capture. The image will automatically be contained in the application to be able to save in different formats.
Cropping and annotation
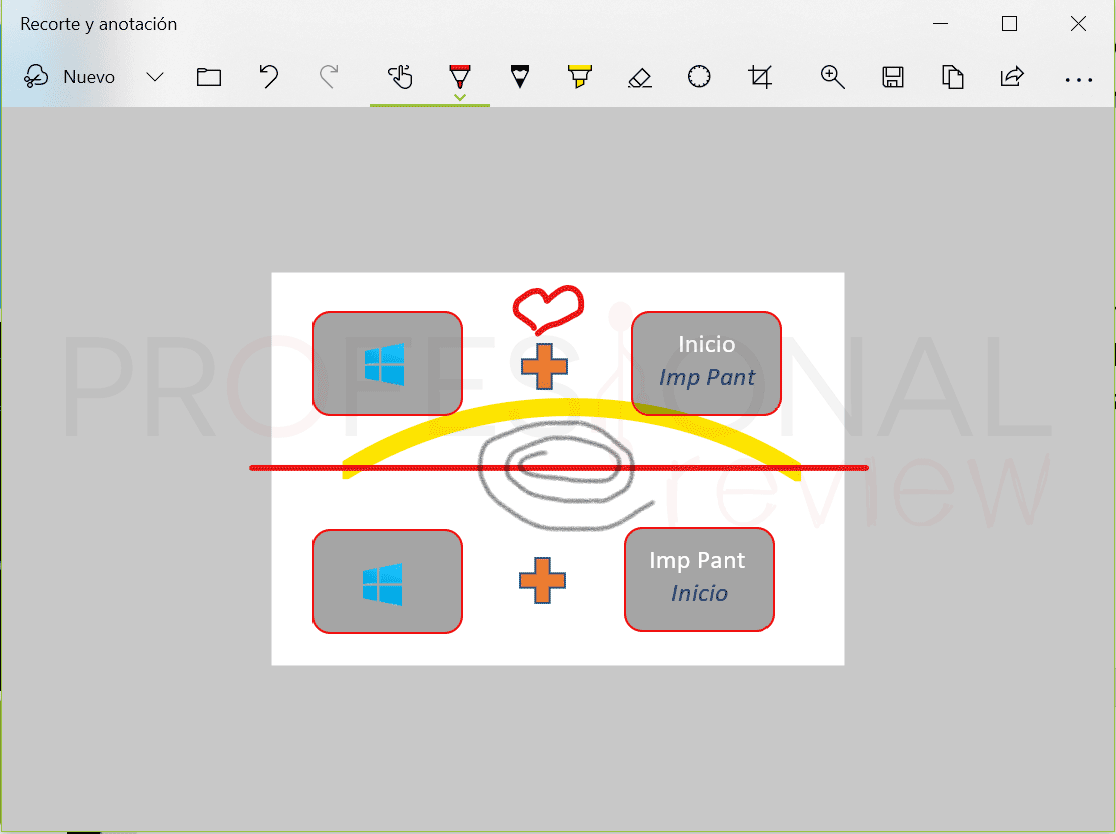
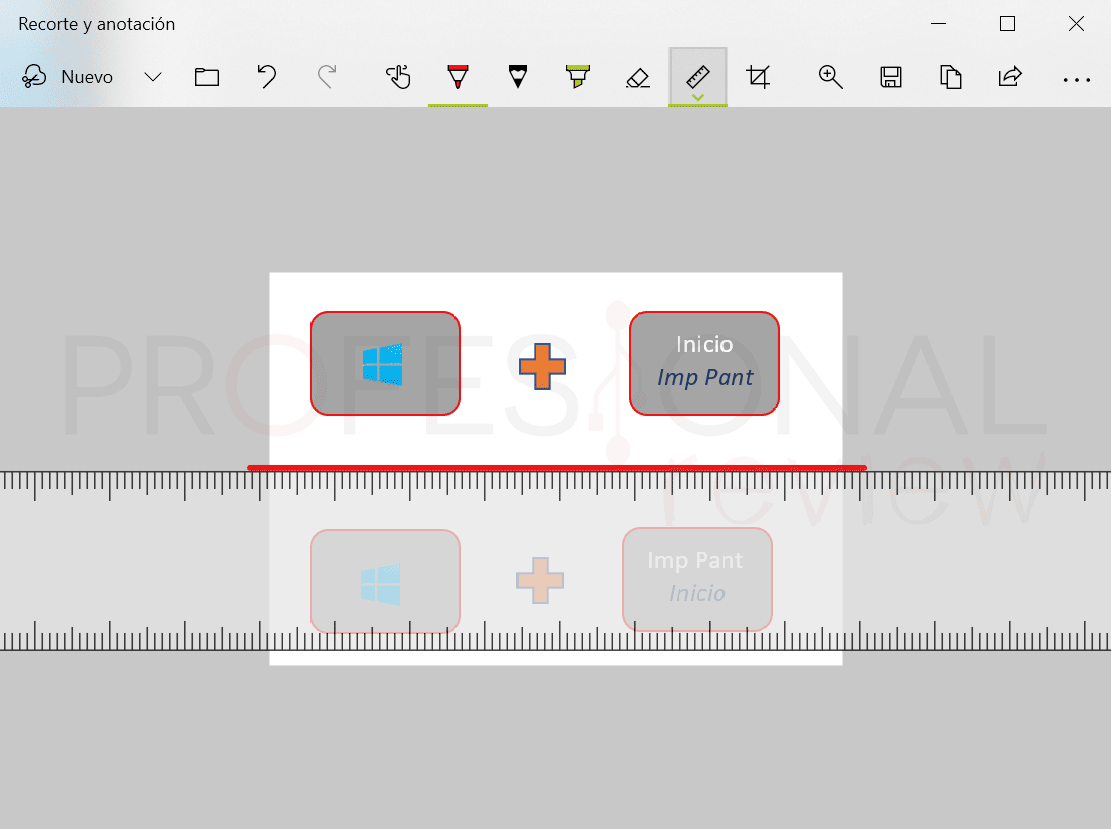
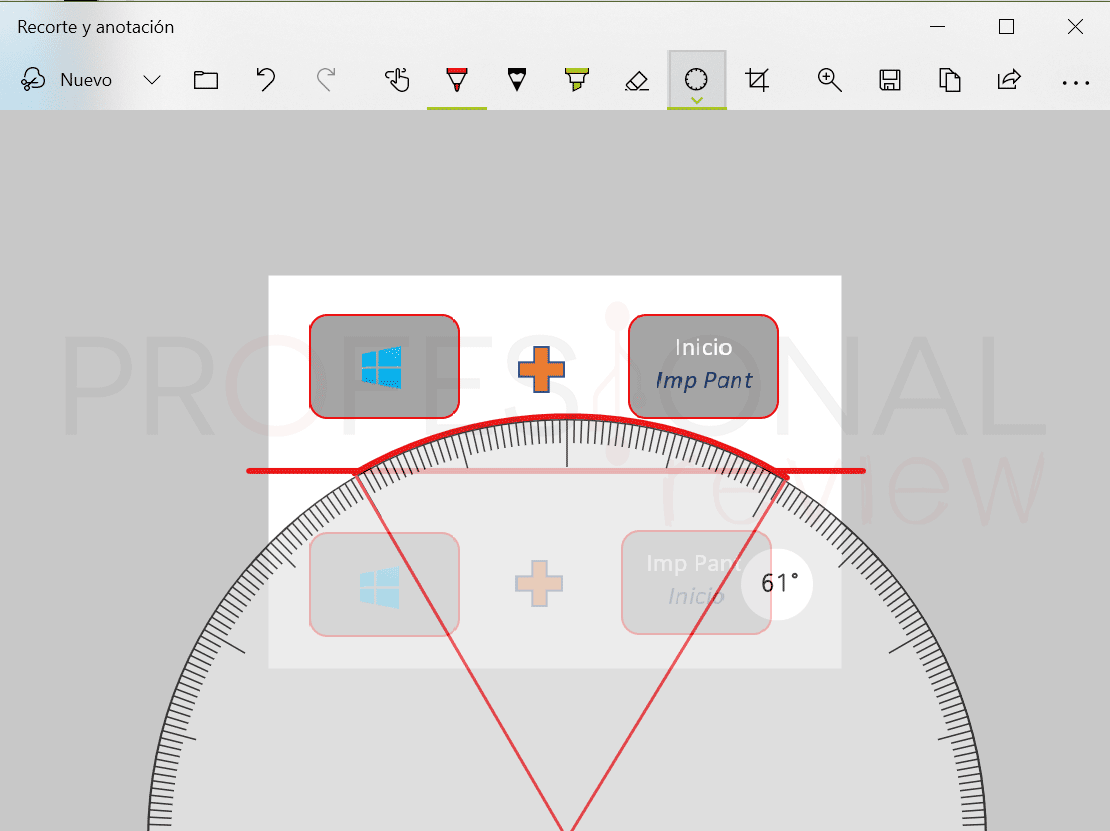
The new version of the previous application provides us with a somewhat more detailed interface. In addition to the options previously seen, it also allows us to quickly edit the capture by writing, pointing to something or even making straight lines with the help of a ruler.
The operation is the same, click on New and a menu will appear at the top with the capture method that we want to carry out.
Using Windows game bar
If you have come this far, it is because you still have not been able to take a screenshot on a laptop PC as you want. There are no shortage of options but if what you want is to take captures while you play , the truth is that the previous methods are not going to be useful or comfortable at all.
The Windows game bar comes to our aid , the one that was previously called the Xbox bar and which has now been updated to provide many more options and use it more easily.
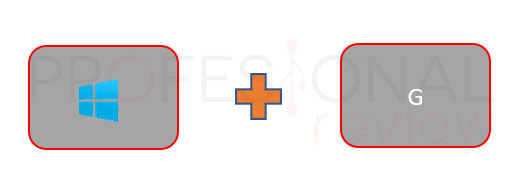
This bar is natively active in Windows 10 and will only act when it detects that we are playing. To open it at any time we will use the Win + G key combination.
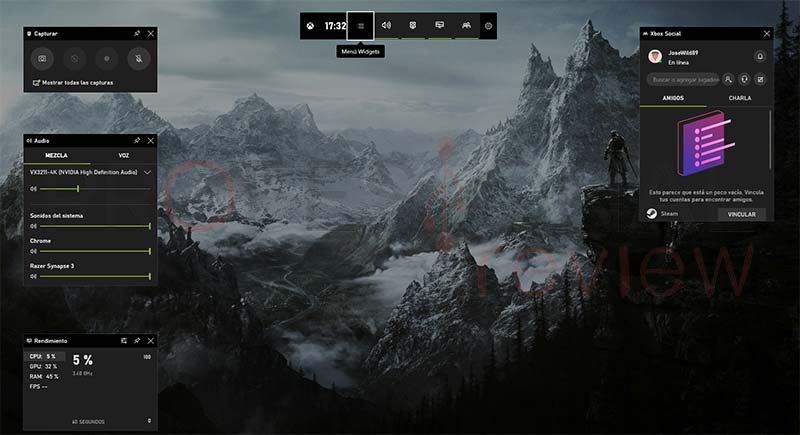
This would be the current aspect of the bar, with a multitude of options such as the Xbox social chat, resource monitor, audio settings and what interests us, the capture section in the upper left corner.
At any time during the game, we can open this bar that will automatically activate the mouse to be able to click on the photo icon and take a screenshot .
In addition, it even gives us the option of being able to record the screen while we play , we do not even need a capture device for it, although of course, it will consume PC resources.
Quick capture method
If this still does not convince us to stop the game to capture the screen, we can use the combination of keys Alt + Win + Imp Pant to take a snapshot and store it automatically without removing the game bar. In the case of our laptop it would be like this:
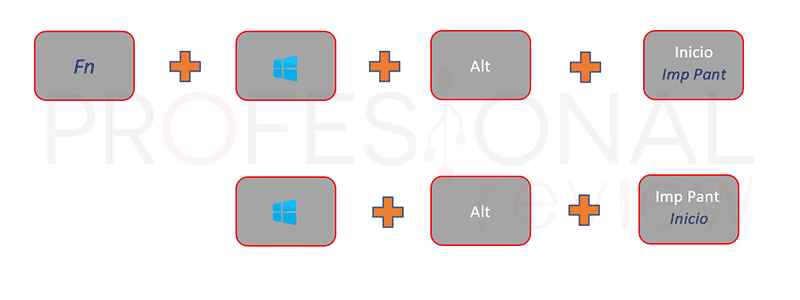
The directory where the captures and videos will be stored will be:
C: \ Users \ <your username> \ Videos \ Captures
Using Nvidia ShadowPlay
If we have an Nvidia graphics card, we have the possibility of taking a screenshot on a laptop PC with the ShadowPlay application . Basically it is a function integrated in GeForce Experience that allows us to install our own game bar from Nvidia.
In this case we will activate it using the Alt + Z key combination if we are in a game.
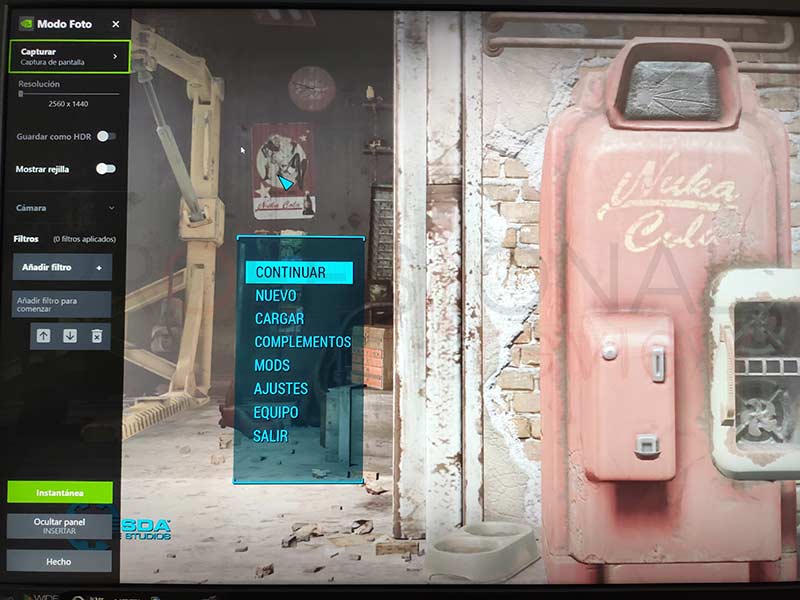
It is very similar to Windows, and will allow us to both record and capture the screen . In this case the possibilities are extended to 3:
- Alt + F1 : we directly capture the entire screen instantly in the game
- Alt + F2 : an editing menu opens in which, in addition to capturing, we can also customize the image.
- Alt + F3 : specific function for games with filters and customization
In this case the images will be stored again in:
C: \ Users \ <your username> \ Videos \
With third party application
The last method to capture the screen is to use a third-party application . There are many free on the internet that provide us with more or less advanced functions similar to those we have seen.
In my personal case, I like to use Lightshot , since it is a very light application and it integrates directly with the Imp Pant key to select a region of the screen that we want. the only disadvantage of it is that the function is not activated when we display pop-up menus.
Other well-known applications will be:
- Apowersoft
- Greenshot
- Grackle
- Icecream
- ShareX
- Skitch
Conclusions
Of course, you cannot complain much about all the options seen to take screenshots on a laptop. With them we can capture any application and game without impediments.
- My computer is noisy – Causes
- How to use your mobile as a webcam (Android or iOS)
- Best monitors on the market
What method is your favorite? If you know of any other way, tell us about it to help more people.


