


What to do if a newly assembled computer won’t turn on? : Main causes
Do you have a newly assembled PC and it won’t turn on? If you have just assembled your equipment and you see that there is no way for it to start and that it does not directly react to the power button, this article is for you. We are going to advise you by explaining the most common causes of this problem. Let’s go there!
This article is for computers where there is no response at all when trying to turn on the PC. Not to other cases such as partial starts. If, for example, your PC does not give an image, we have an excellent article aimed at it.
Index of contents
Check the front panel connections and bypass the ignition
To turn on your PC from the computer case, what you do is send a signal to the source from the motherboard. In fact, you will send it yourself if your PC still does not turn on after trying this point, it will be the next section.
But of course, the power button that we press is in the box, so there is a cable from the box to the motherboard to serve this purpose. If you haven’t connected the front panel cables, you are already at fault, but even if you have connected them you may be doing it wrong.
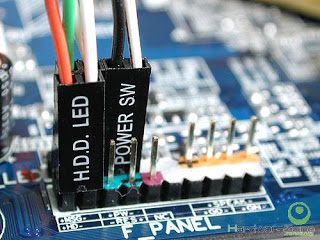
 The cables we are referring to are of the PWR_SW, PWR_LED, HDD_LED, RESET, etc style, and they have a very small connection. They certainly do not go unnoticed when assembling a team.
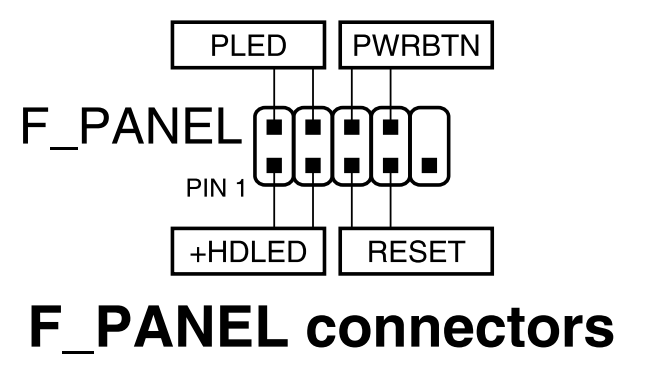
These cables go to the connection on the front panel of the motherboard, which is usually right in its lower right corner. It is identified by the name “F_PANEL”, “FRONT PANEL” or “JFP1”, depending on the manufacturer of the board. In the first pages of the user manual of the motherboard it should be indicated, in the form of a tutorial. If you cannot find it, look in the same manual for a diagram of the motherboard, and there you will see where it is located.
Now, the important thing is to know how the connections are made. Here what interests us is to see the position of the PWR_SW, that is, in which two specific pins that connection is. It will be what we will use to try the ignition. These positions are both in the manual and on the motherboard itself, although it is difficult to read.
Unplug everything you have on the front panel and, with the PWR_SW position learned, take a metal screwdriver, or any metal object, and make a bridge by touching those two pins. If the equipment turns on, you have already identified your problem: either you are making the connection from the box wrong, or the switch on the box does not work. The latter is highly unlikely.
If the PC still does not turn on, read on …
Check if your power supply is working properly by jumper
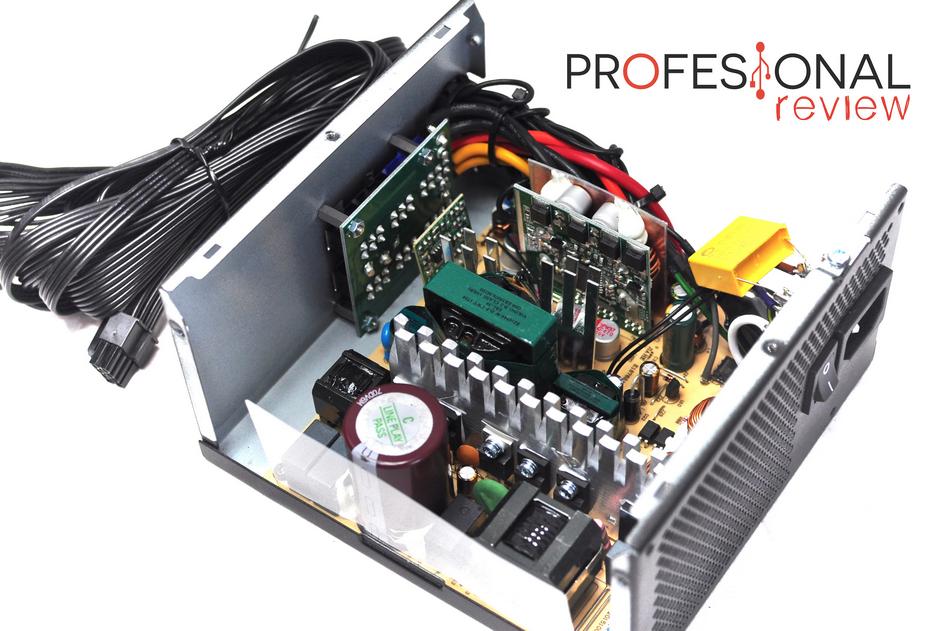
 One of the flagship methods of trying to diagnose why your newly assembled PC won’t turn on is bypassing the power supply. This basically consists of causing the source to turn on without the need for a motherboard, and thus we will know if our source is not working.
How to do this? It is very simple. The first thing you should do is get a paper clip or any similar object, which is a metal wire. For plastic clips, trim both ends a little to expose the metal. Another interesting option can also be the typical sliced bread wire.
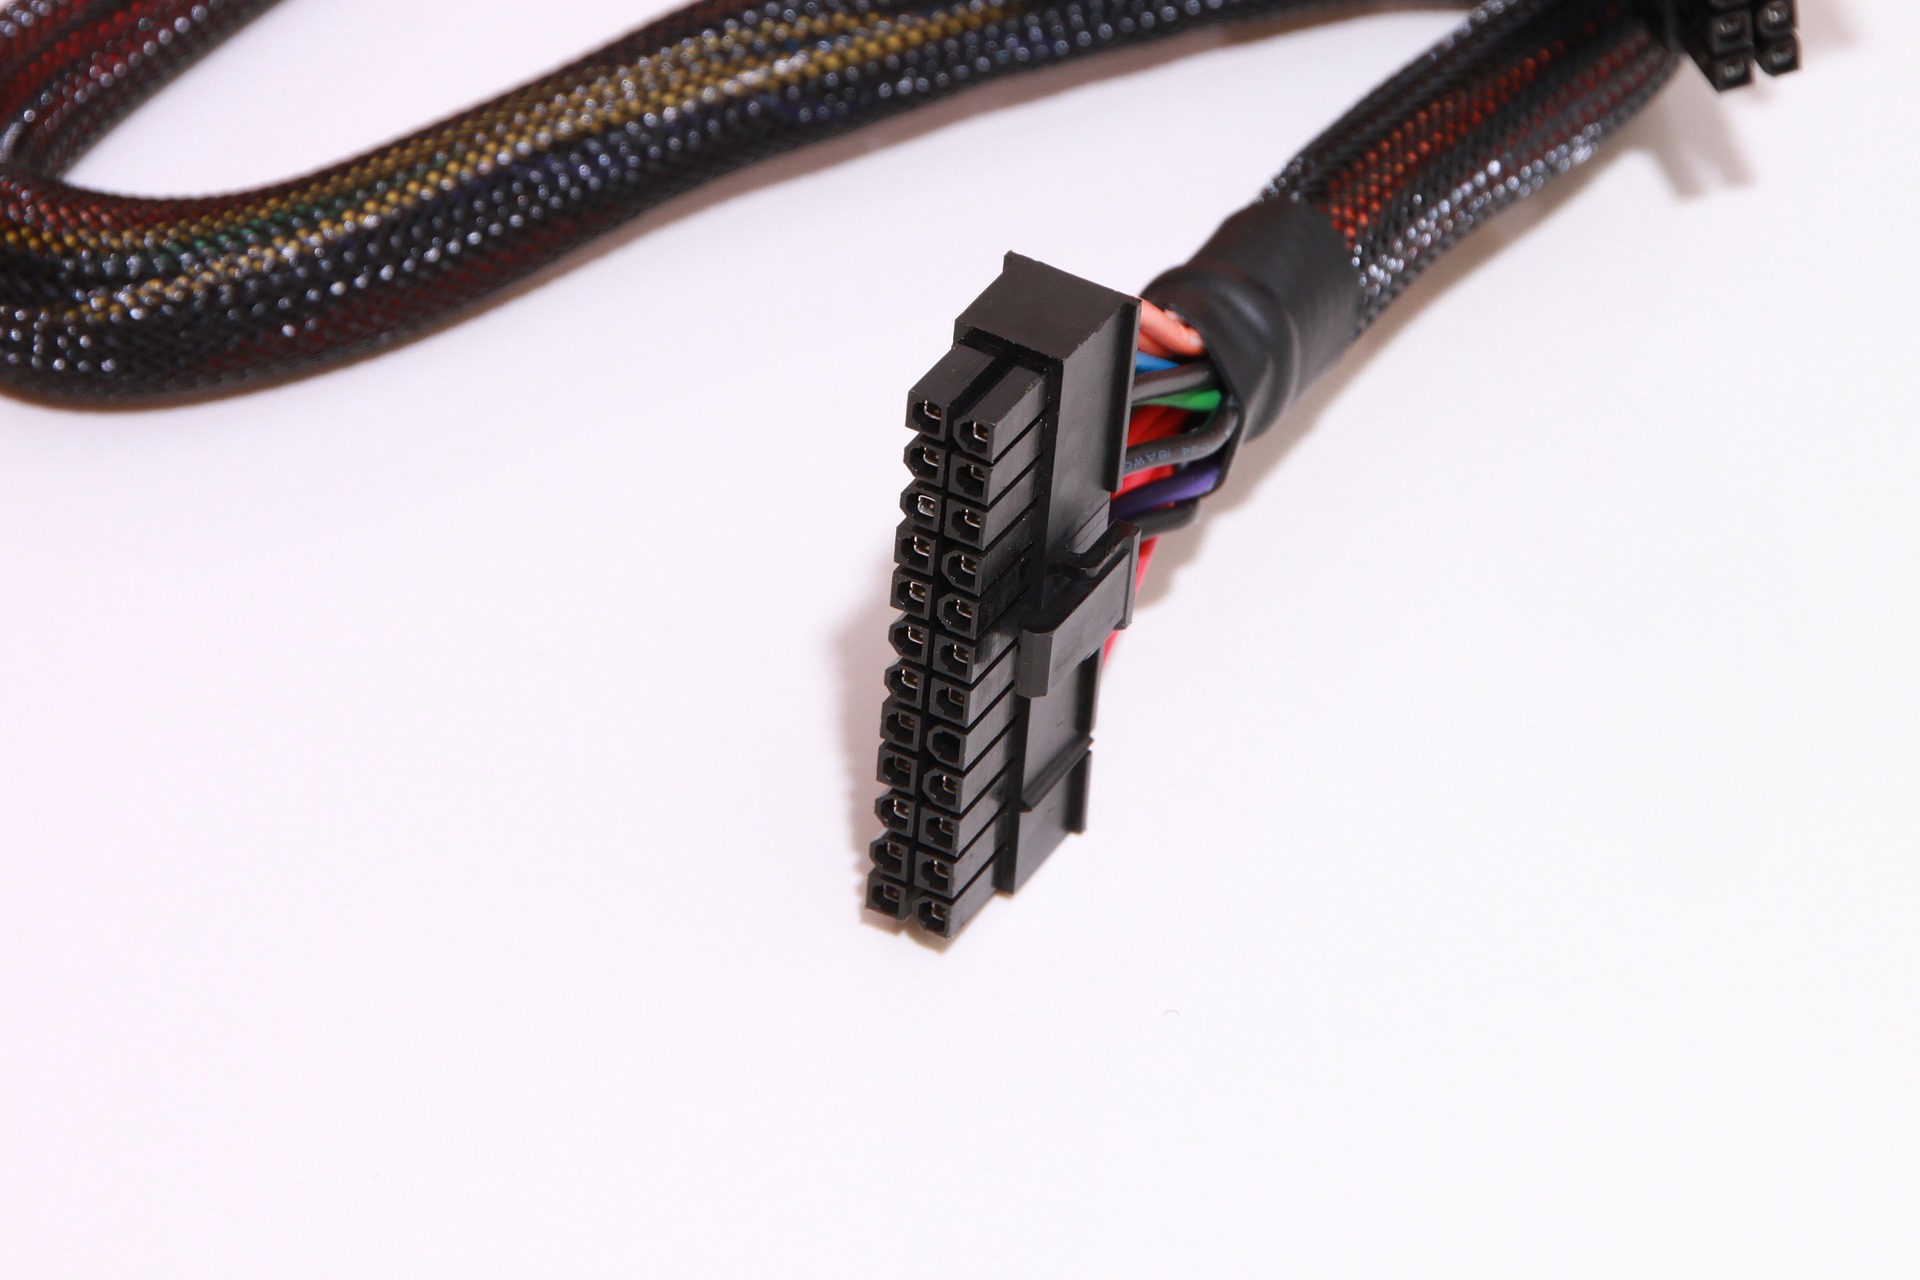
So what you need to do is a bridge between two pins of the source ATX cable, that is, the fat cable that connects to the board with a 24-pin connector.

And what pins are those? In the photo above we show them to you. In old fonts or those with colored wires, they would correspond to green with any black. Currently almost no source has colored cables, so you should locate PS-ON in the diagram above.
Take a good look at the tab and take advantage of the empty pin that you will see in the connector to locate yourself.
We are going to give you this reference to locate it. Explanation regarding the EMPTY PIN, as long as you see it on the RIGHT SIDE:
The PS-ON is on the 4th pin above that empty pin. Connect the clip there, and then connect it to any other black pin. For example, the one just above the empty pin.
Once that bridge is made, keep it, do not do it half-way or “put and drop” it. If you’ve done the process right and the source is connected to power, one of two things should happen:
- That the fan turns on, even if it does so only at the beginning because it is a semi-passive source.
- If it is a modern source, you should hear a clicking noise that corresponds to a relay. This noise sounds once when turned on and once when turned off.
Although you would have to see each specific case, if your newly assembled PC does not turn on but the power supply responds then you should already rule out a culprit, almost in all probability.
 And what happens if the source does not give any answer and I conclude that it is broken? When this happens, it does not necessarily mean that you have bought the power supply wrong, but that you have received a DOA (Dead On Arrival). Come on, the product worked when it left the factory, but it arrived without working for its recipient.
This is usually due to problems with the transport, predictably from the factory, when the source is faulty but initially works, and with the whole movement of the transport it ends up breaking completely.
Connect everything well if you have a modular power supply
This point may seem elementary, but it is not for everyone. We have seen in recent years how many people do not correctly connect the connectors of a modular source , and with the newly assembled PC they see that it does not respond in any way, it does not turn on, and they think (with all legitimacy) that there is something defective.
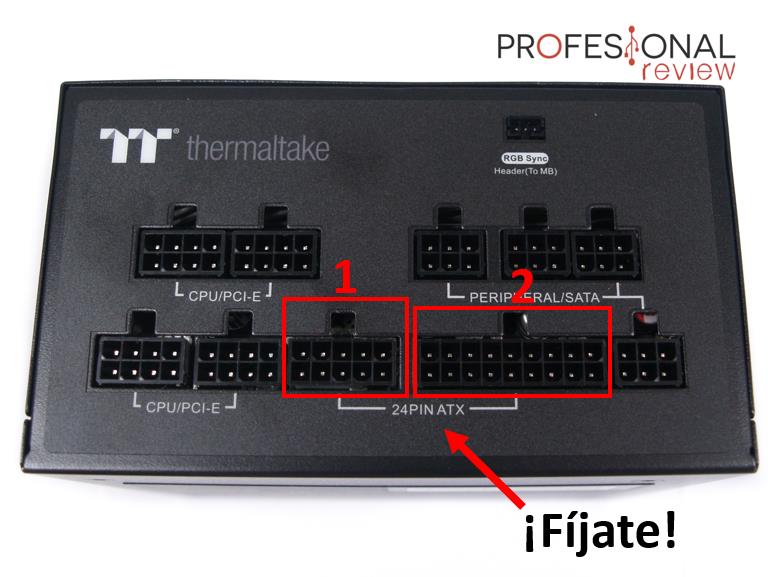 In particular, we can see how sometimes the connectors are partially inserted, which obviously leads to the source not working. But there is a very specific case that is surprisingly common: misconnecting the ATX cable, that is, the 24-pin “big cable” that goes to the motherboard.
It turns out that, in any power supply, this cable has two different connectors on the end that goes to the modular part. For some reason, many people only connect one end, and leave the other (usually the small one) unconnected. This causes that the source can be bypassed, but the equipment will never turn on, and that leads to think that the problem is elsewhere.
So, now you know, be very careful to avoid these kinds of mistakes.
A short in your box?
 We continue with the possible problems that may occur in the assembly of the equipment. There is a case that is quite unlikely and somewhat “extreme”, but it can happen sometimes. It is possible that there is some kind of short circuit in the mounted PC, you could have (for example) a loose screw at some point that causes it.
So to check this the best alternative is to take the motherboard out of the box and put it back on a non-conductive hard surface, for example on top of the motherboard box itself (never on top of the antistatic bag). Then, try to do the manual jumper of the board ignition, to see if this is how the equipment responds.
Take the opportunity to check all the connections thoroughly, and perhaps even take the source out of the box as well.
A CPU installed incorrectly or with bent pins
Unfortunately, we are getting into somewhat uncomfortable solutions, since if the PC still does not turn on after these tests it is very possible that you are facing a much bigger problem, and having to disassemble parts with the newly assembled equipment is not something satisfactory.
Well, one of the things that can happen is that the assembly of the CPU has been incorrect, causing the pins to bend, which leads to short circuits and, ultimately, the equipment not turning on.
So, we invite you to remove the heatsink and processor from the PC, we already know that it can be somewhat tedious, so if you are very sure that you have mounted the CPU correctly, you do not have to do it. To find out if a processor is properly mounted, check if:
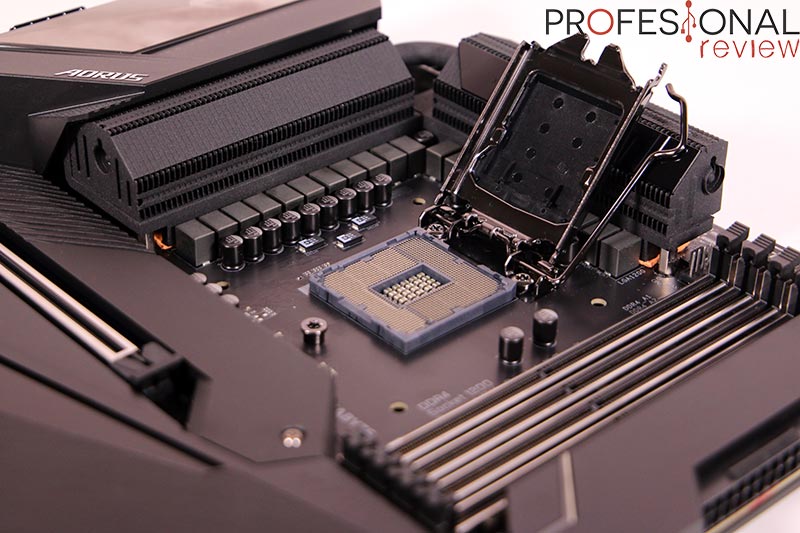
- You have aligned the CPU correctly, guiding you by the “triangle” in one corner of the processor and the motherboard, aligning them. For example, on socket AM4, the CPU is not mounted “right”, but as seen in the image above.
- Positioning the CPU and closing the lever has been a simple process, which has not required you to apply force. The processor was completely still in place almost instantly, and you had no trouble closing the lever.
Even if you are sure, sometimes a processor or board can arrive with broken pins, especially if it is reconditioned. In case you have thermal paste to replace, check the CPU or board pins (as applicable), and make sure they are okay.
DOA motherboard
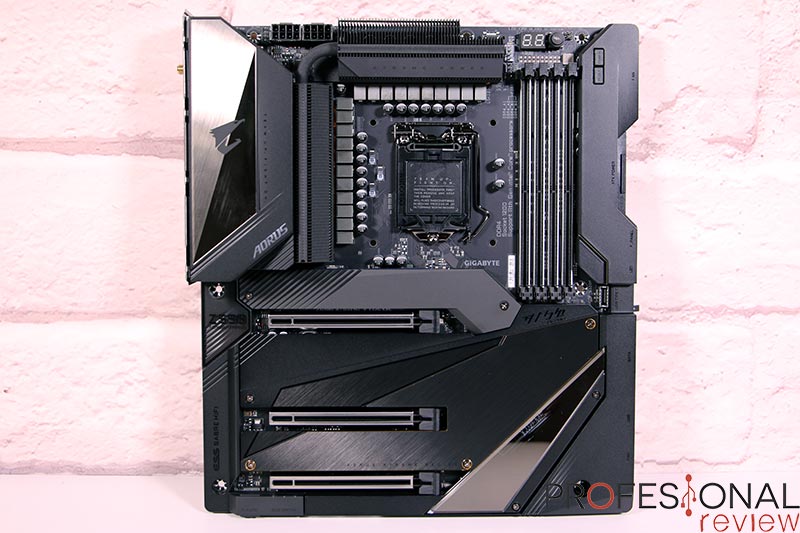 One of our last options is to assume the fact that the DOA (Dead on Arrival) component is the motherboard. It is not something very common, but it is not impossible either. It could be said that less than 1% of motherboards arrive defective.
The point is that the lottery can come to anyone, especially if it is for something bad. You may need to order a motherboard replacement if you exhaust yourself. Also, considering the 14-day return (minimum) it might be reasonable to return it and purchase a replacement to rule out the problem.
If your newly assembled PC still won’t turn on …
If you cannot find any solution or alternative to these problems, then your problem may be deeper, or that there is something too specific that is passing over us. In that case, an interesting alternative is to write in our hardware forum, detailing as much as possible what has happened to you, and we will try to help.
Finally, the last possible option that you can think of is to go to the technical support of the store where we bought the equipment, although in most cases they will not provide support for parts purchased separately. Alternatively, a physical store could be of help.
Final review on the causes of a newly assembled PC that won’t turn on
When your newly assembled PC won’t turn on, it’s normal to panic. But, in many cases, the problem is due to something simple, with an easy solution, such as a wrong connection.
In this article, we have collected what we consider to be the most common causes, focusing on:
- An incorrect connection of the front panel: we recommend bypassing the PC power directly on the motherboard, using a screwdriver.
- A faulty power supply: we checked it by bypassing its ignition.
- ATX connector incorrectly inserted in a modular source: we have seen many cases of people who partially connect this connector since in modular sources it has 2 different connections.
- A short in the case – This is checked by removing the board (and source) from the PC case. It is possible that we are left with a screw or something short-circuiting the equipment and preventing it from turning on, due to protections on the plate or the source.
- An improperly installed CPU – it could even have bent pins (or the board).
- A faulty motherboard – It is a much less common case than the sources, but it can happen.